This article describes how to enable Nexus OTP in Smart ID Digital Access component as two-factor authentication method for Cyberoam, to replace static passwords.
Nexus OTP can be either Nexus TruID Synchronized or Smart ID Mobile App OTP, or any other OATH-based mobile OTP application, such as Google Authenticator or Microsoft Authenticator.
With the setup described in this article, Digital Access functions as a RADIUS server and Cyberoam as a RADIUS client. Nexus TruID is used as an example below and is available for iOS, Android, and Windows.
Network schematic for Nexus OTP authentication
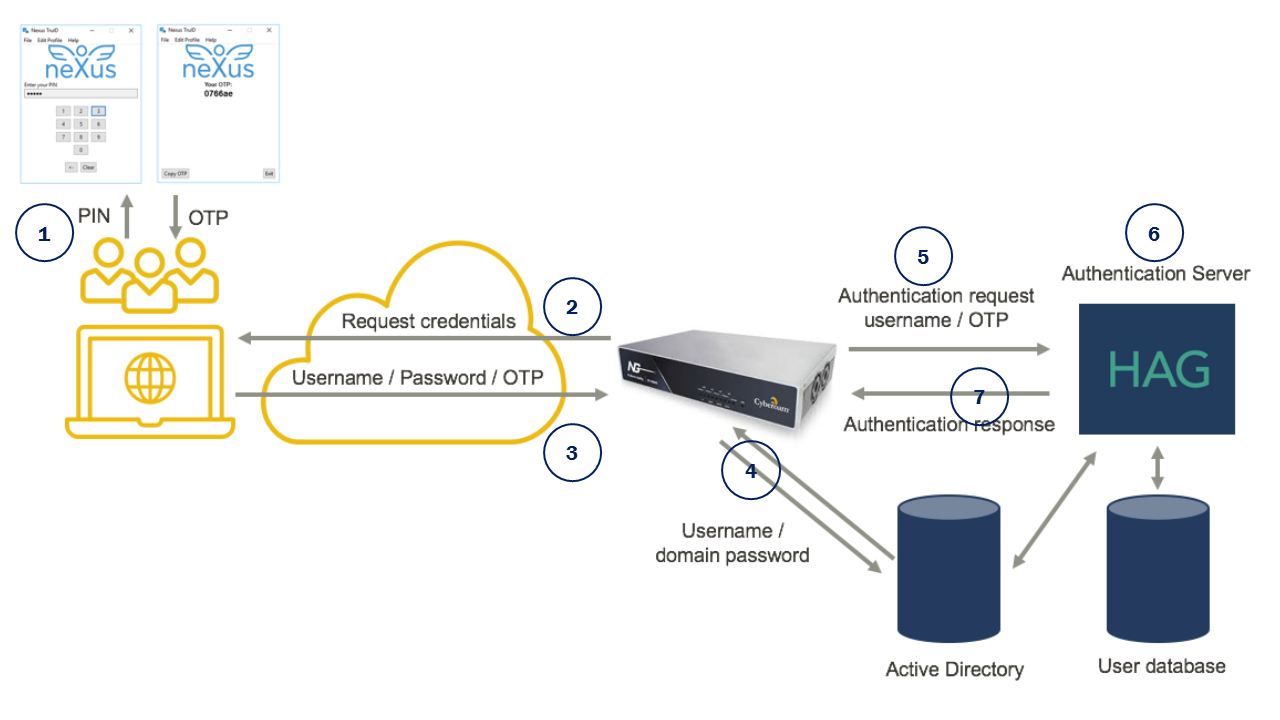
Network schematic with Nexus TruID Synchronized as an example.
-
The end user starts the TruID client and enters the PIN in TruID to generate an OTP.
-
Cyberoam request the end user to enter username, password and OTP.
-
The end user enters username, domain password and OTP.
-
The domain credentials are validated by the Active Directory.
-
The OTP authentication request is relayed to Digital Access Authentication Server via RADIUS.
-
The authentication server validates the OTP with the associated TruID token and PIN from the user database.
-
Upon successful validation, the authentication server responds with successful authentication to Cyberoam.
Cyberoam provides access to the end user.
Make settings in Digital Access
Make settings in Cyberoam
Add Digital Access as RADIUS Server
-
Log in to the Cyberoam administrative interface.
-
Navigate to Identity > Authentication > Authentication Server.
-
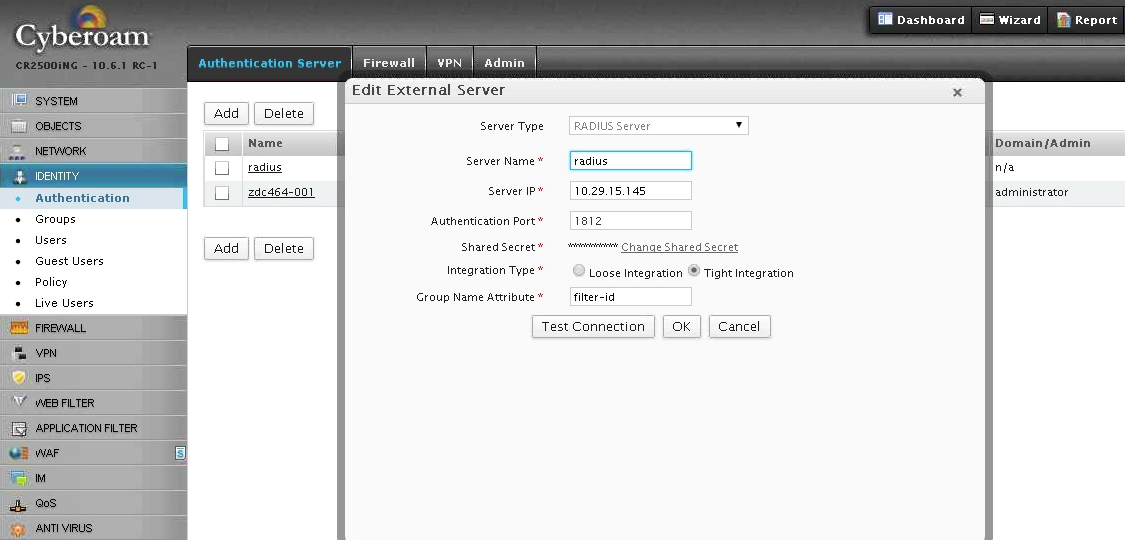
Click Add to configure RADIUS Server parameters as shown in the table below.
Parameter
Value
Description
Server Type
RADIUS server
Select RADIUS server. If user is required to authenticate using a RADIUS server, appliance needs to communicate with RADIUS server for authentication.
Server Name
CR_RADIUS
Specify name to identify the RADIUS server.
Server IP
172.16.16.18
Specify RADIUS server IP address.
Authentication Port
1812
Specify port number through which server communicates. By default, the port is 1812.
Shared Secret
cyberoam
Provide shared secret, which is to be used to encrypt information passed to the appliance.
Integration Type
Tight Integration
Select Tight Integration with the appliance if you want to use vendor specific attribute for setting the user group membership and specify group name attribute.
Group Name Attribute
Filter-Id
Group name attribute is vendor specific.
-
Click Test Connection to check if Cyberoam is able to connect to the RADIUS Server.
-
Cyberoam prompts for administrative credentials to test the connection as shown below. Enter the credentials and click Test Connection. If connection is successful, click OK to save the configuration.
-
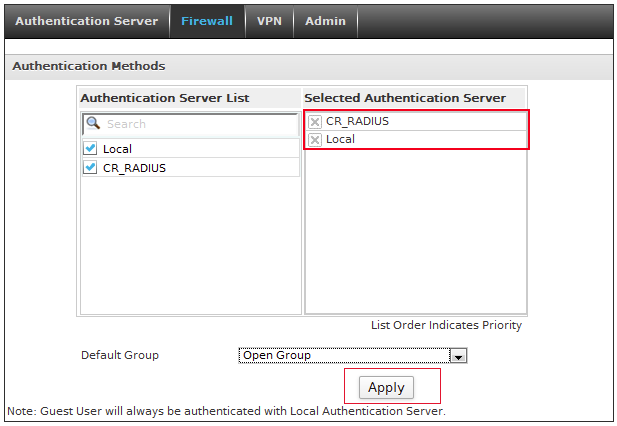
Go to Identity > Authentication > Firewall.
-
Select RADIUS Server as primary authentication server.
-
Click Apply to save configuration.
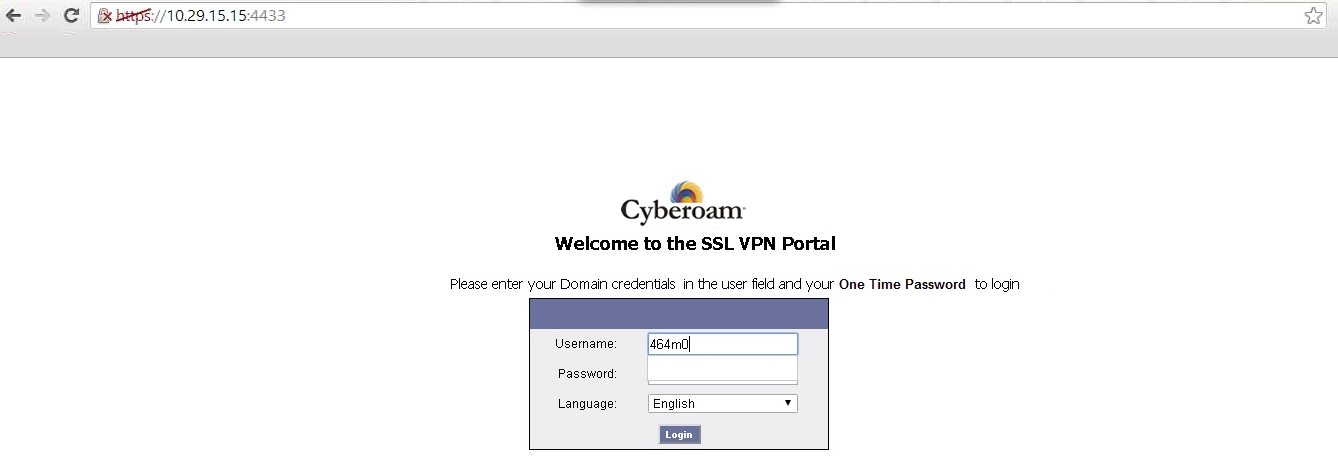
Example: Log in to Cyberoam
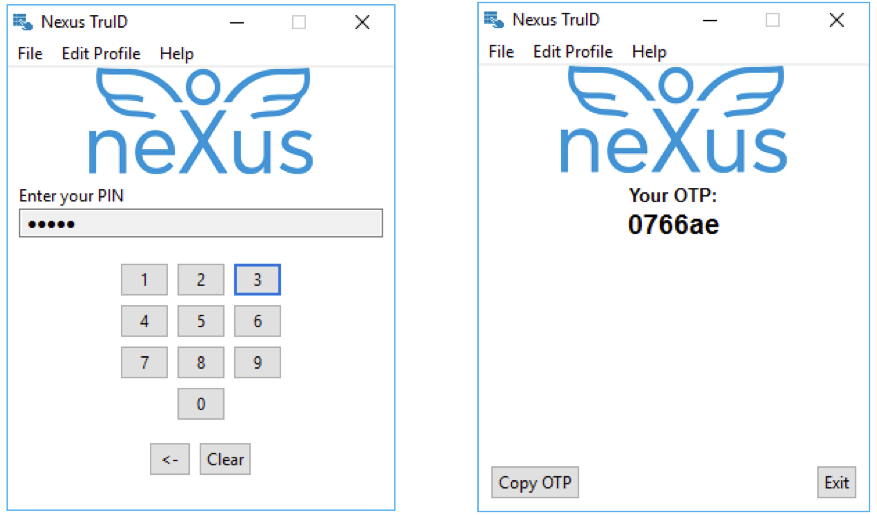
The following example shows how an end user logs in, using Nexus TruID synchronized. Other Nexus OTP methods can be used in a similar way.
Use Nexus TruID as 2FA to log in to Cyberoam
-
Start Nexus TruID that is installed on your laptop or smartphone - Enter your PIN to generate an OTP.
-
Enter Key-In domain login id and password along with Nexus TruID OTP.
Related information