When using Card SDK (via Identity Manager Operator) the encoding device needs to be set up in Card SDK Configuration Manager.
Prerequisites
-
Step-by-step instructions
Add encoding device
-
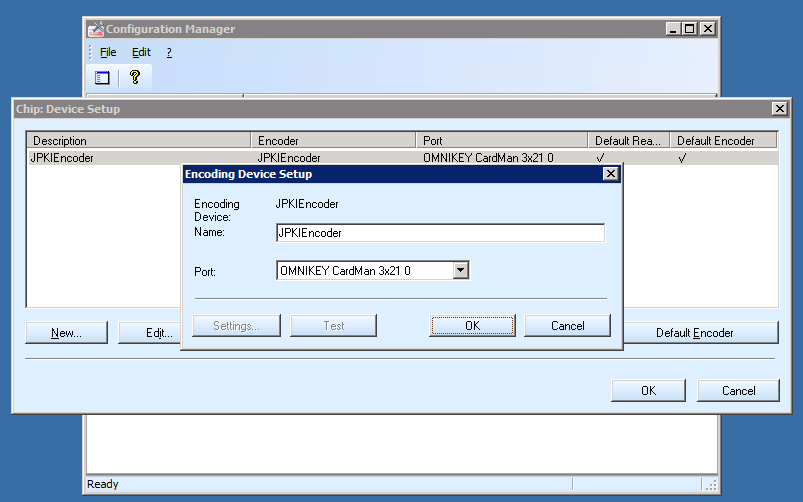
In Card SDK Configuration Manager, open the Contact Chip Encoding property. The Chip: Device Setup dialog box opens.
-
Click New... to add and configure a new device. The Chip: Select Device dialog box opens.
-
Select the appropriate encoder or reader, in case of an integrated encoder, select the printer. Click OK.
-
Select the JPKIEncoder and click OK.
-
In the Encoding Device Setup dialog box, select the corresponding PC/SC Reader device.

Nexus recommends to install the original driver software for the PC/SC Reader provided by the manufacturer.
Integrated chip encoding
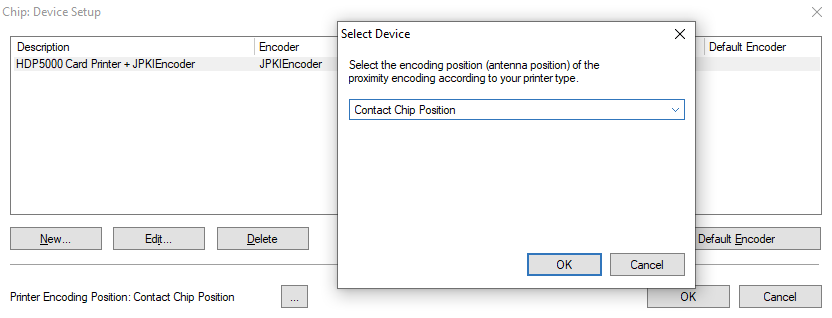
For integrated chip encoding in a card printer, and depending on the printer model in use, it may be necessary/possible to choose the correct position of the integrated encoder.
-
Select the newly created device in the Encoding Device Setup dialog box. As the chosen printer supports the Printer Encoding Position selection, the device-dependent button gets visible.

-
Click the device-dependent button in the dialog to select the Printer Encoding Position for this device (RFID Chip or Contact Chip Position).
Restart service
-
After the encoding device is configured, open the IDProductionService property in Configuration Manager and click Restart Service. For more information regarding IDProductionService, see Initial setup of Configuration Manager.

Java Client Installation
On the local client, Smart ID Identity Manager connects via Java JRE to the Pkcs#11 Middleware Library. Therefore the Java JRE must be the same platform architecture (32 or 64 bit) like the Middleware library. In doubt, it should be safe to choose 32-Bit JRE.
