Select fields in Registration Authority in Certificate Manager
The Registration Authority (RA) in Certificate Manager is used by officers to send various kinds of certificate requests to the CM host.
This article describes how to select which fields that shall be present in the Input fields panel.
Select fields
The Input fields panel in the Registration Authority (RA) application window contains a Fields Chooser button, where you can select which fields to display. The available fields and the order in which they appear depends on settings in the configuration file iv.conf. (Refer to Configure Registration Authority in Certificate Manager for more information on how to configure.)
Click the button to the right of the input fields. A Fields Chooser dialog box appears.
Which fields that are shown depends on the officer's role. How to configure the field repertoire is described in the Technical Description.
Example of input fields:
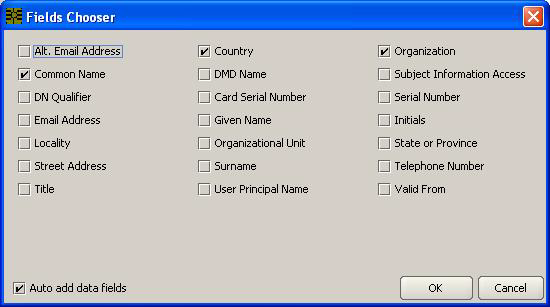
Select which fields to present and click OK. The order of the presented fields is fixed and they will be shown in the same order as they are listed in the Fields Chooser dialog box when reading from left to right.
When accessing a personalized smart card there may exist other fields than the ones you have selected in the Fields Chooser. The fields that are not selected will not be displayed and they will be excluded from the certificate.
Optional: Check Auto add data fields to override the settings in the Fields Chooser dialog box and to present all available fields in the smart card. All fields in the initial data are guaranteed to be displayed at all times until this option is cancelled.
You may use the Auto add data fields option as a template. The template will show all the fields ever encountered even if they are empty. This setting remains until you cancel the option.
Subject Information Access field
If the Subject Information Access field is chosen, a button will appear in the field. To enter information into this field, click on the button and another display window will appear.
For information concerning subject information access extension, refer to RFC 5280 - Internet X.509 Public Key Infrastructure Certificate and CRL Profile.
Click the + associated with the Subject Information Access field.
Enter the Access method OID to be used.
Select either the URI or E-mail option in the Access location section and enter the required information.
Click Finish.
Click OK to close the dialog.