This article is valid for Digital Access 6.0.4 and later.
Smart ID Digital Access component offers the following extension Programming Interfaces (XPIs):
Digital Access XPI REST API
See the full documentation in Digital Access XPI REST API.
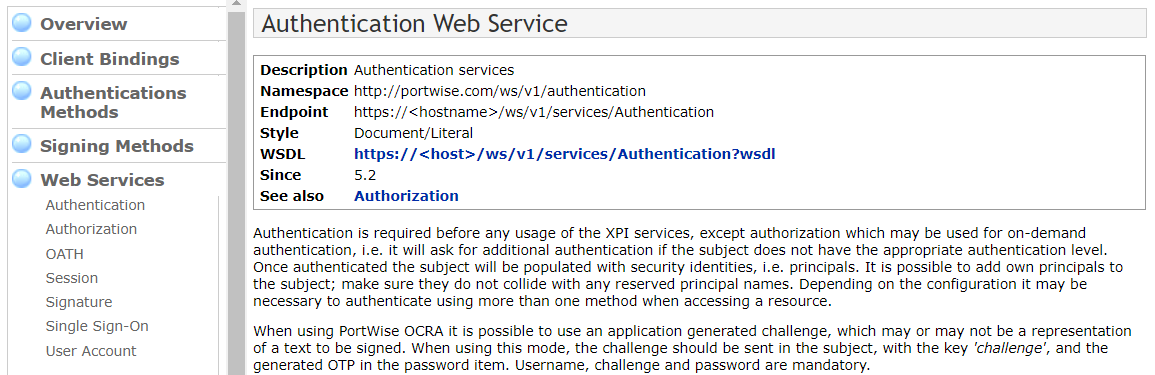
Digital Access XPI Web Services
See the full documentation here.
From April 1st 2025, only the latest versions of XPI:WS will be supported as referred here: https://<host>:4443/ws/v4/index.html
This means all versions below will be end of life and should be replaced by the latest version of the respective web services:
-
XPI:WS Extension Programming Interface (v1)
-
XPI:WS Extension Programming Interface (v2)
-
XPI:WS Extension Programming Interface (v3)
-
XPI:WS Extension Programming Interface (Legacy)
Use XPI service via SOAP UI tool
Prerequisites
Integration through the Extension Programming Interface (XPI) must be enabled:
-
In Digital Access Admin, go to Manage System.
-
Click a registered Policy Service to edit it.
-
Select Enable XPI: REST or Enable XPI: WS.
-
If you want to enable the XPI and SOAP services, the expose port ID should be 0.0.0.0 in Digital Access Admin.

-
Delegate the admin privileges to a User storage user or a Local user:
-
Go to Manage system > Delegated Management > Super Administrator >Add Administrator, read more here: Create administrative roles in Digital Access.
-
-
For XPI logging as a Local user:
-
Add a user and enable auth mech.
-
-
For XPI logging as a User storage user:
-
Enable auto linking:
-
Go to Manage Accounts and Storage > Global User Account Settings.
-
On the User Linking tab:
-
under General Settings, select Enable PortWise Authentication when automatically linking the user.
-
under PortWise Password, select Use password from User storage.
-
-
-
Step-by-step instruction
Get WSDL in soap UI
-
Get Web Service Description Language (WSDL) in soap UI from https://da-admin.swedencentral.cloudapp.azure.com:4443/
-
Choose the services from the navigation menu. Select and read the detailed information for each service.
Set up soap request
-
Authentication is required before any usage of the XPI services - import authentication wsdl in request editor:
WSDL https://da-admin.swedencentral.cloudapp.azure.com:4443/
-
Send a request with inputs in subject:
<subject>
<country>?</country>
<credentials>
<key>username</key>
<value>YTE=</value> – username with base64 encoded value
</credentials>
<credentials>
<key>password</key>
<value>bmV4dXNAMTIz</value> – Password with base64 encoded value
</credentials>
</subject>
See the authenticate example below.
-
A valid response has Session, use it in the following request:
<principals>
<key>session</key>
<value>OXg5eWYyM2QxcHRz</value>
</principals>
-
-
Select an admin privileged task, such as a User Account operation.
-
To get end point service, choose the service from https://da-admin.swedencentral.cloudapp.azure.com:4443/ and import wsdl.
-
This is an example of adding a user account:
<user:add>
<subject>
<principals>
<key>session</key>
<value>OXg5eWYyM2QxcHRz</value> -> provide session value from authentication response
</principals>
</subject>
<account>
<enabled>true</enabled>
<displayName>user1</displayName>
<emailAddress>user1@gmail.com</emailAddress>

<globalAccess>
<locked>false</locked>
<maxRetries>10</maxRetries> - constants
<numRetries>0</numRetries> -constants
</globalAccess>
<userName>user1</userName>
<validFrom>1586975400000</validFrom> → date in this format
<validTo>0</validTo>
</account>
<linkToDirectory>false</linkToDirectory> - true is want to link to AD
</user:add>
See the add user example below in Example files.
-
-
Additional information
Example files