
Transaction Signatures lets your application have users sign data with BankID (or another Swedish eID) through Smart ID Digital Access (DA).
Your app sends the text to be signed; DA runs the eID signing procedure; you get back a cryptographic signature stored in a tamper‑evident ledger.
The request/response examples in this guide are real responses from a live Smart ID Digital Access system, and the screenshots are from the actual signing procedure.
This is the main guide for application developers.
Related articles:
-
Administrator Service setup (how a DA administrator enables the feature, configures the ledger database, the SAML signing federation, and the OAuth2 client you will use.) Language examples:
How Transaction Signatures works
There are only four moving parts. Your client app talks to the Digital Access API. The user talks to BankID. Your app never touches BankID or SAML directly. Digital Access does all of that.
CLIENT APP                       DA                          BANKID
   |                              |                             |
   |  1. POST /sign/prepare       |                             |
   |  "sign this text please"     |                             |
   |----------------------------->|                             |
   |  { uniqueId, signUrl }       |                             |
   |<-----------------------------|                             |
   |                              |                             |
   |  2. Redirect user to signUrl |                             |
   |----------------------------->|  3. DA sends user to BankID |
   |                              |---------------------------->|
   |                              |     User signs with BankID  |
   |                              |<----------------------------|
   |                              |                             |
   |  4. User returns to          |                             |
   |     returnUrl with status    |                             |
   |<-----------------------------|                             |
   |                              |                             |
   |  5. GET /sign/signatures/{id}|                             |
   |----------------------------->|                             |
   |  { signatureValue, ... }     |                             |
   |<-----------------------------|                             |
Your app never sees SAML, never talks to BankID, never handles certificates.
Prerequisites
Ask your DA administrator (see Administrator Service setup) for three things:
-
An OAuth2 client with the
transaction_signscope: gives you aclient_idandclient_secret. -
A registered redirect URI (your
returnUrl): where the user returns after signing. Unregistered URLs are rejected (400). -
The DA base URL: scheme + host of the access point, e.g.
https://da.example.com. Do not include a path like/wa. Use the Access Point DNS configured for Transaction Signatures (the same host thesignUrlcomes back on); a different access-point host may not serve the signing flow.
Redirect URI rules. Your returnUrl:
-
Must be HTTPS:
http://…is rejected with400 {"error":"returnUrl must use HTTPS"}. -
Must be registered on the OAuth2 client, and the client must be Published: new clients and redirect-URI changes are staged until an administrator clicks Publish in the DA admin. Before publishing,
/oauth/tokenreturns 401 for the client and/sign/preparerejects thereturnUrl. -
Cannot be
localhost: a real host or IP over HTTPS works.
The API at a glance
|
What |
Method |
Path |
Auth |
|---|---|---|---|
|
Get OAuth2 token |
POST |
|
client_id + secret |
|
Prepare signing |
POST |
|
Bearer token |
|
Poll status |
GET |
|
Bearer token |
|
Get signature |
GET |
|
Bearer token |
|
Verify integrity |
GET |
|
Bearer token |
|
Sign page (user) |
GET |
|
None (browser) |
All paths are prefixed with the DA base URL + /https/api/rest/v3.0, for example: <https://da.example.com/https/api/rest/v3.0/sign/prepare.>
Step 1: Get an OAuth2 token
POST /https/api/rest/v3.0/oauth/token
Content-Type: application/x-www-form-urlencoded

grant_type=client_credentials
&client_id=YOUR_CLIENT_ID
&client_secret=YOUR_CLIENT_SECRET
&scope=transaction_sign
Response:
{
  "access_token": "eOlT0IWnkPMvC2PU5cLx",
  "token_type": "Bearer",
  "expires_in": 600
}
Use it on every API call: Authorization: Bearer eOlT0IWnkPMvC2PU5cLx
On this install the token lives for 600 seconds (10 minutes). Cache it and refresh before it expires. The exact lifetime is set by the DA administrator, so read expires_in rather than hard-coding it.
Step 2: Prepare the signature
Tell DA what to sign and who should sign it.
POST /https/api/rest/v3.0/sign/prepare
Authorization: Bearer YOUR_TOKEN
Content-Type: application/json

{
  "tbsData":   "SSBhZ3JlZSB0byBwYXkgMTAwMCBTRUsgdG8gQWNtZSBDb3Jw",
  "userId":    "199001011234",
  "returnUrl": "https://your-app.com/sign-done"
}
-
tbsData: the text to sign, Base64-encoded. The user sees this text in their BankID app. Keep it short (max 5 KB decoded).
-
userId: who should sign. Typically a Swedish personal number, but it can be any identifier such as an email. See Signer identity matching below.
-
returnUrl: where the browser goes after signing. Must be registered as a redirect URI on the OAuth2 client.
Response:
{
  "uniqueId":  "591bc1c20a3155458213759b042ddfa5441274177344b4214e723219268c25c0",
  "signUrl":   "https://oidc.lagerberget.se/https/api/rest/v3.0/sign?uniqueId=591bc1c2...",
  "expiresAt": "2026-06-30T13:02:26"
}
The presignature expires after 15 minutes.
Note. The signUrl is absolute and DA returns the eID access point that runs the signing procedure. It may differ from the host you called for the API. Do not rebuild it; just redirect the user to exactly what DA returns. Use the Access Point DNS configured for Transaction Signatures as your base URL (the same host the signUrl comes back on) to keep everything consistent.
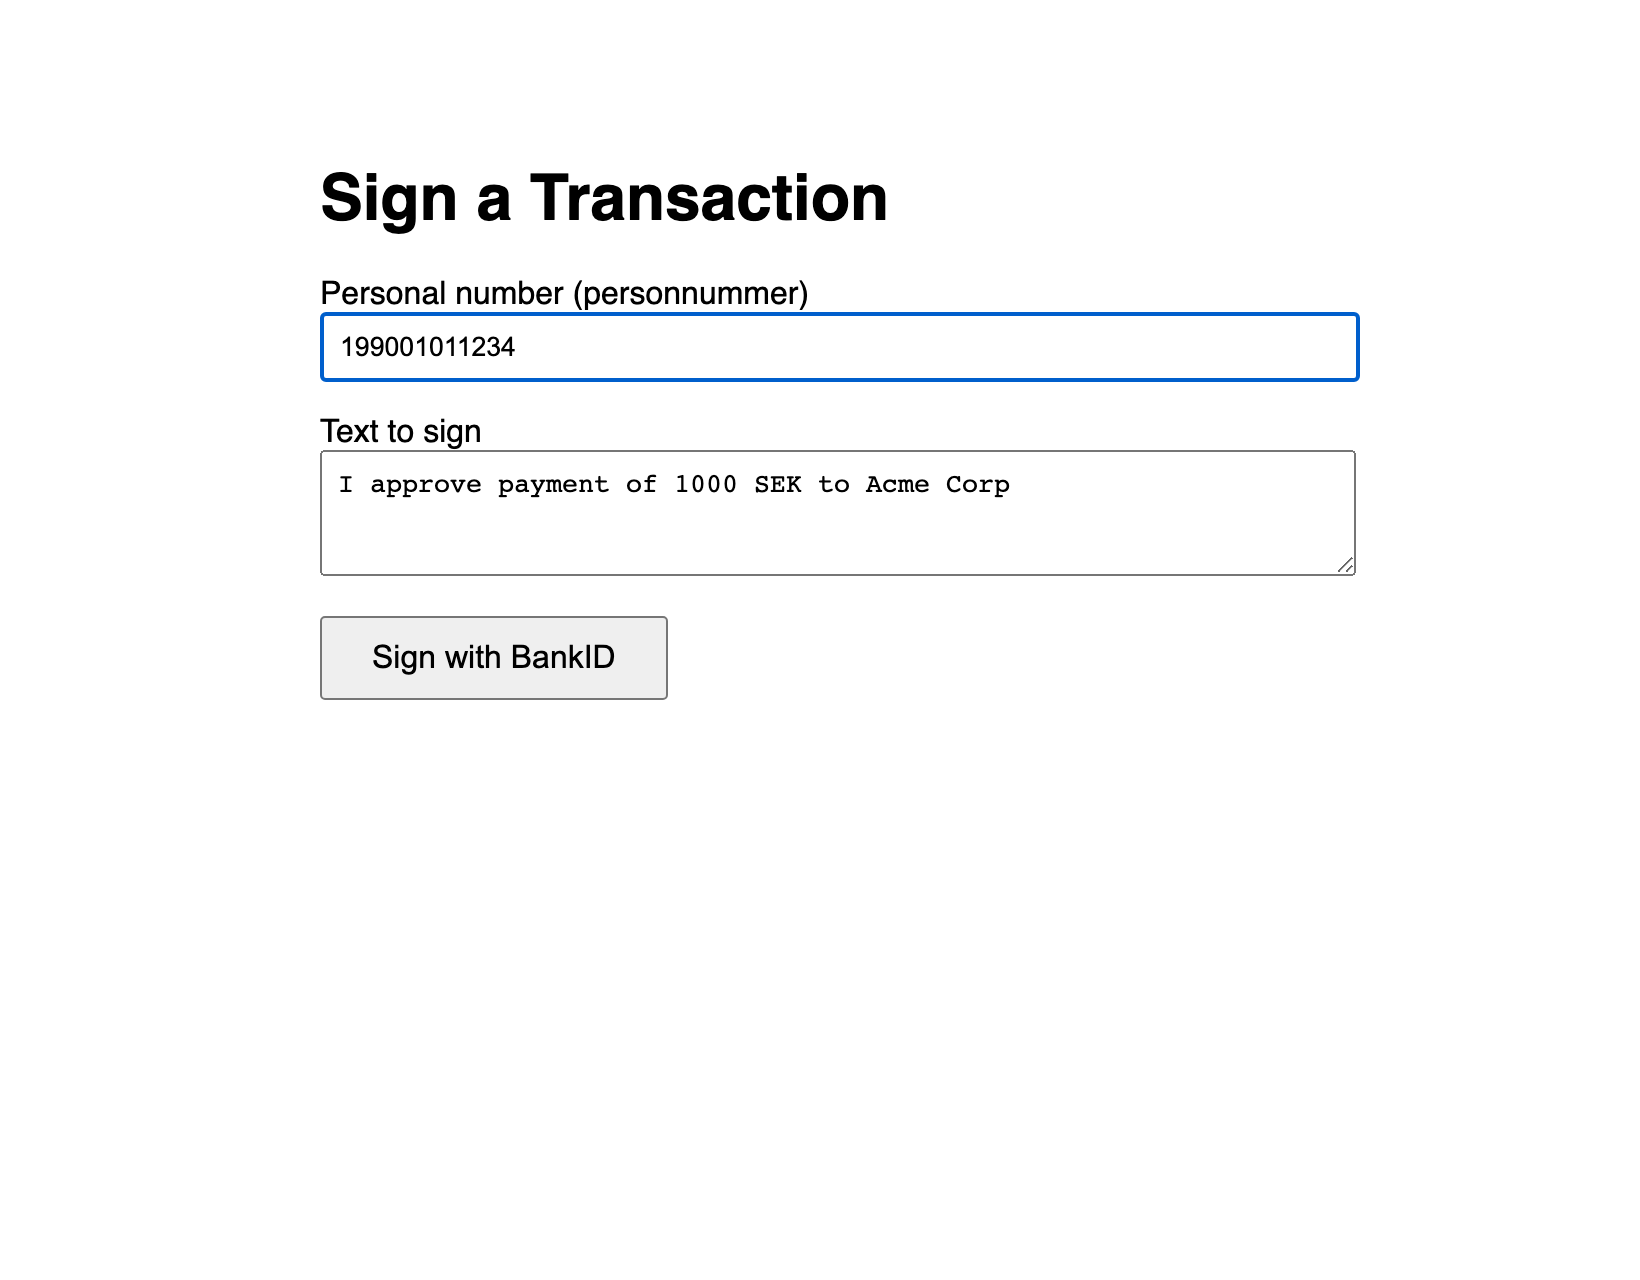
In your app this is one screen. Collect the text + user id and submit:
Step 3: Send the user to the sign URL
Redirect the user's browser to the signUrl:
-
PHP:
header('Location: ' . $signUrl); -
Node.js / Express:
res.redirect(signUrl); -
Python / Flask:
return redirect(sign_url) -
Client‑side JS:
window.location.href = signUrl;
DA now runs the eID signing procedure.
What the user sees:
-
BankID signing page: DA shows the branded signing page. It displays the transaction text (your
tbsData) and a QR code. The user starts the BankID app and scans the QR.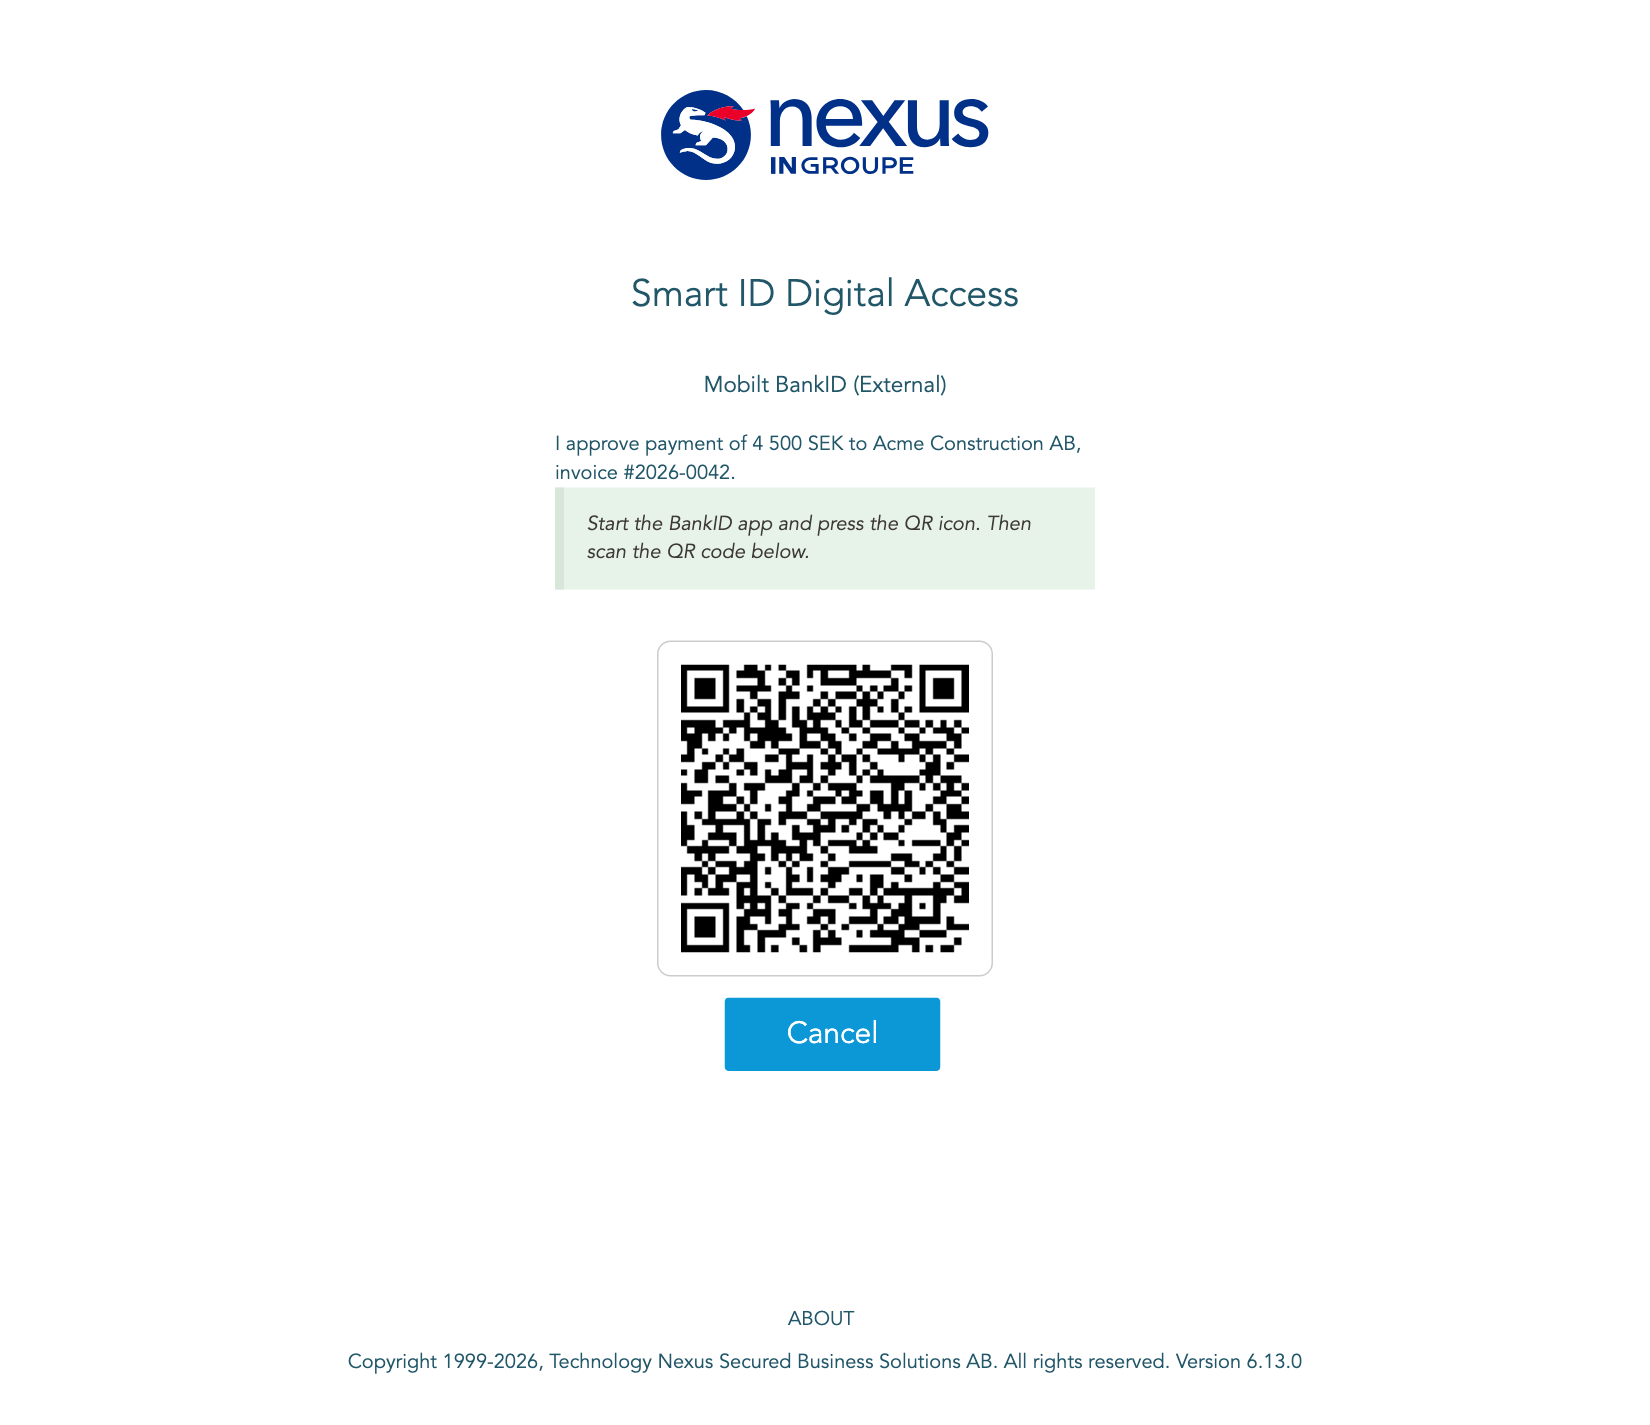
-
Review and confirm: the same text is also shown inside the user's BankID app (DA carries it in the SAML SignMessage extension). The user reviews it and confirms in the app. Showing the text is what makes this a signing procedure rather than a plain login.
Step 4: Handle the callback
After signing (or on error) the browser is redirected back to your returnUrl with query parameters.
On success: https://your-app.com/sign-done?status=completed&id=a1b2c3d4...
On error: https://your-app.com/sign-done?status=error&message=Signing+failed
Read status:
-
completed: success.idis theuniqueId. -
error:messagehas the details.
The signer's identity is not included in the callback URL (to avoid PII leaking via Referer headers / browser history). Fetch it via the API next.
Step 5: Fetch the signature
GET /https/api/rest/v3.0/sign/signatures/{uniqueId}
Authorization: Bearer YOUR_TOKEN
Response:
{
  "uniqueId":           "a1b2c3d4...",
  "signatureValue":     "MIIG...base64...==",
  "signatureAlgorithm": "http://www.w3.org/2001/04/xmldsig-more#rsa-sha256",
  "eidProvider":        "BankID",
  "status":             "completed",
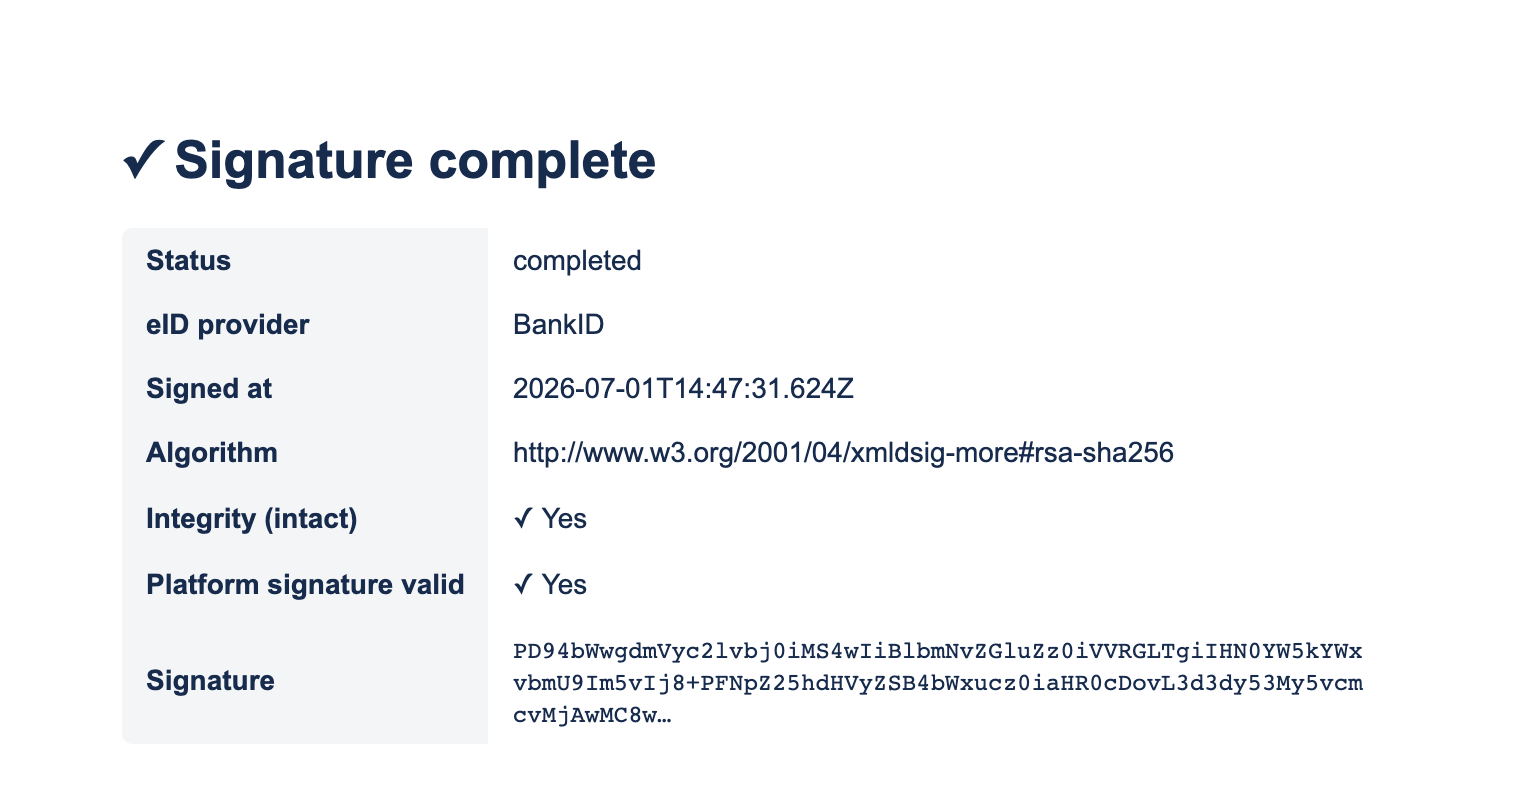
  "createdAt":          "2026-07-01T14:47:31.624Z"
}
The signatureValue is available only for a limited retrieval window. Fetch it promptly and store it on your side.
The tbs is embedded in the signature (verified live). For a BankID signature, the returned signatureValue is a Base64 XML-DSig document whose bankIdSignedData contains a usrVisibleData element, the Base64 of exactly the text you sent as tbsData. In a real completed signature this decoded to "I approve payment of 4 500 SEK to Acme Construction AB, invoice 2026-0042.", that is proof the user was shown, and signed, your text.
Before the user finishes signing, GET /sign/signatures/{uniqueId} and /sign/verify/{uniqueId} return 404 {"error":"Signature not found"}, while GET /sign/status/{uniqueId} returns 200 {"status":"pending"}. Wait for status: completed (or status=completed on the callback) before fetching the signature. (Both behaviors verified live.)
Optional: Verify integrity
GET /https/api/rest/v3.0/sign/verify/{uniqueId}
Authorization: Bearer YOUR_TOKEN
{
  "uniqueId":               "a1b2c3d4...",
  "intact":                 true,
  "storedHash":             "abc123...",
  "calculatedHash":         "abc123...",
  "platformSignatureValid": true
}
If intact is false, the stored signature was modified. This should never happen because the database is a SQL Server LEDGER (append-only, tamper-evident) table.
Optional: Poll status instead of waiting for the callback
GET /https/api/rest/v3.0/sign/status/{uniqueId}
Authorization: Bearer YOUR_TOKEN
{ "uniqueId": "a1b2c3d4...", "status": "pending" }
Status values: pending, processed, completed, expired, cancelled, error. Poll every 2-3 seconds until it is no longer pending.
Signer identity matching
When you send a userId, DA records it as the expected signer. After the eID procedure, the actual signer's identity is also recorded. What happens on a mismatch is a server-side setting controlled by the administrator:
-
OFF (default, relaxed): mismatch is logged, signing proceeds. Use when you send an email/username but BankID returns a personal number.
-
ON (strict): signing is rejected on mismatch. Use when you always supply the exact identifier BankID returns (personal number).
Your client code does not change. Always send a userId and let DA handle it.
Rate limits
-
Prepare endpoint: 20 requests/minute per OAuth2 client.
-
Sign URL (browser): 10 requests/minute per IP.
On a 429, wait at least one minute before retrying.
Error handling
|
HTTP |
Meaning |
What to do |
|---|---|---|
|
200 |
OK |
Proceed |
|
400 |
Bad request (missing/invalid fields) |
Check the request body. Common: |
|
401 |
Invalid or expired token |
Get a new OAuth2 token |
|
403 |
Missing |
Check the OAuth2 client config |
|
404 |
Signature not found |
Wrong uniqueId or wrong client |
|
410 |
Presignature expired / already used |
Create a new one with /prepare |
|
429 |
Rate limit exceeded |
Wait and retry |
|
503 |
Feature disabled / not configured |
Contact the DA administrator |
Response format, verified live. API-level errors (400, 404) come back as JSON, e.g. {"error":"returnUrl is not a registered redirect URI for this client"} or {"error":"Signature not found"}. Authentication failures (a missing, invalid, or expired Bearer token, or wrong client credentials on /oauth/token) are returned by the access point as an HTML 401 page ("No valid credentials were passed to the Proxy"). Check the HTTP status code, not the body, when handling 401.
A real signing app (worked example)
The app collects the text to sign and the signer's id, then a single button runs steps 1–5 above:
Clicking Sign with BankID calls /sign/prepare, redirects to the signUrl (the BankID signing page shown in Step 3, which displays the same text), the user confirms in their BankID app, and the app fetches and displays the signature on return:
Complete, runnable versions of this app in four languages are in ../clients/.
Language examples
Each example is a complete, runnable mini-app that does the whole flow:
-
PHP: 3 files in a web directory. No frameworks. Simplest.
-
Node.js (Express): single-file Express server.
-
Python (Flask): single-file Flask server.
-
React (Next.js): React frontend + Next.js API routes.
Runnable source. Ready-to-run versions of all four (with .env templates and run instructions) live in ../clients/. Each was run against a live DA and verified end-to-end: the form renders, POST /prepare returns a real 302 → signUrl, and the /sign-done callback fetches and renders a real completed signature (intact: true, platformSignatureValid: true).